
Power BI Interview Questions
Learn How to use Power Query Editor
WHAT IS POWER QUERY EDITOR?
- The Power Query Editor is used to transform or edit data files before they are actually loaded into the Power BI. Query Editor is the primary location for data preparation, where you can connect to a huge range of data sources and apply hundreds of different data transformations by previewing data and selecting transformations from the query editor.
Why use Power Query Editor?
- Use Power Query Editor to connect to one or many data sources, shape and transform the data to meet your needs, then load that model into Power BI Desktop.

HOW TO USE POWER QUERY EDITOR?
- STEP 1: To get to Power Query Editor, select Transform data from the Home tab of Power BI Desktop.

With data connections, Power Query Editor appears like this.
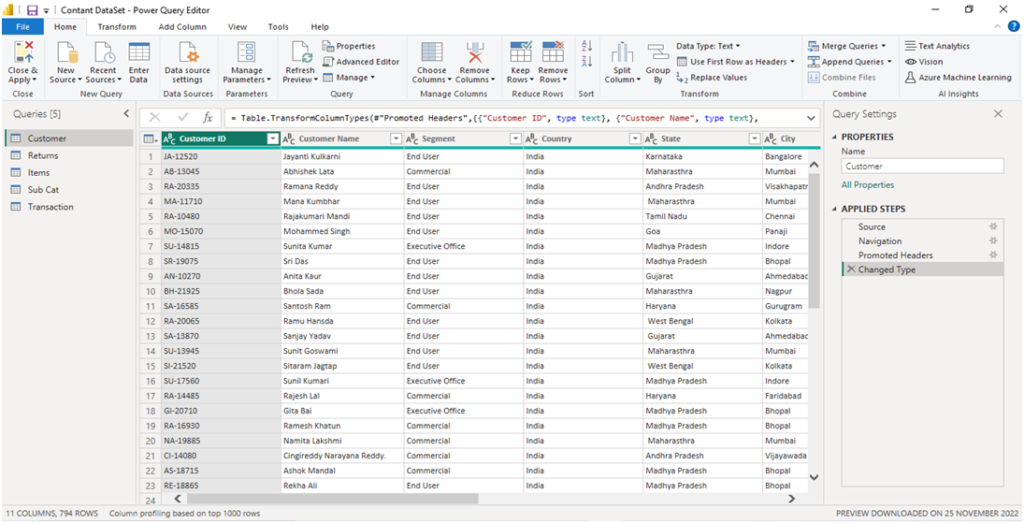
Managing Columns:
STEP 1:To remove a single column, select the column you want to remove, and then select Home > Remove Columns > Remove Columns.
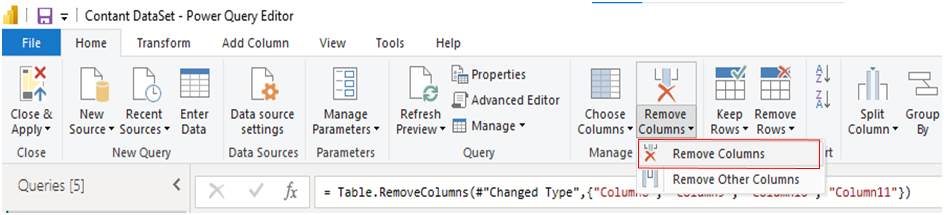
STEP 2:To remove several columns, select the columns by using Ctrl + Click or Shift + Click. The columns can be contiguous or dis-contiguous.

Manage Rows
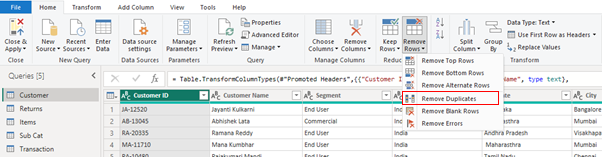
- STEP 1: Here we will remove duplicates from the rows, select the rows where you want to remove duplicates, and then select Home > Remove Rows > Remove Duplicates.
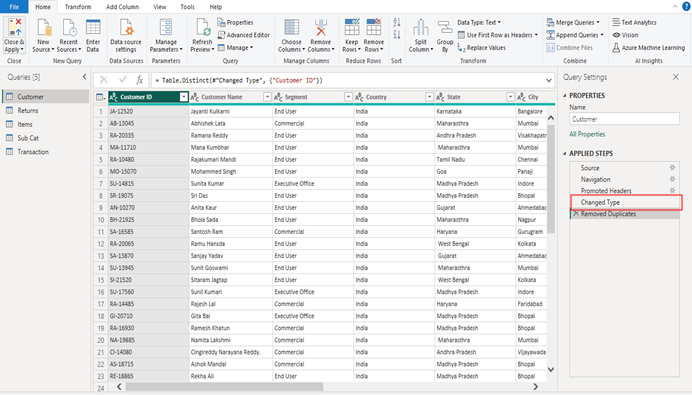
After performing we will see that we have removed the duplicate from our data in the applied steps.
Date Transformation
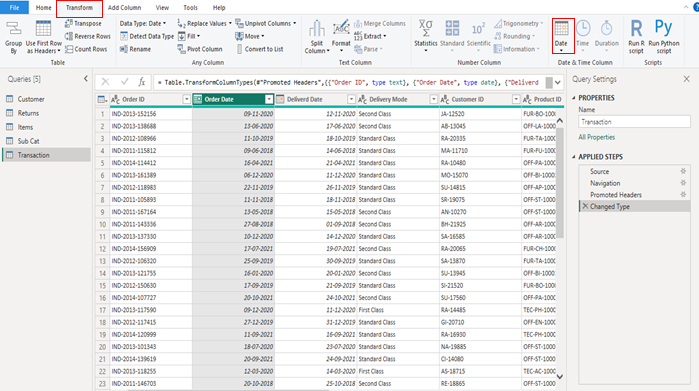
STEP 1: First, go to Transform Tab. Under this tab, you can see the Date and Time options. You can use these drop-down lists to format the dates.
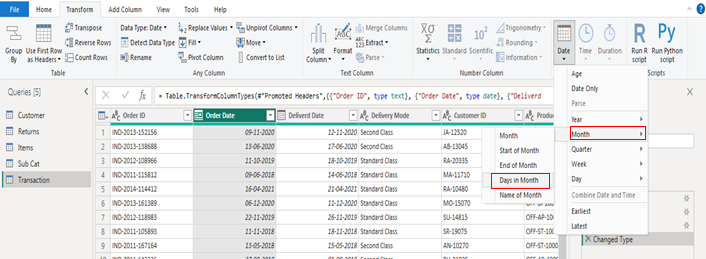
STEP 2: Clicking the down arrow beside the Date show you the drop-down list of available date formats. Here, we are selecting Days in Month.
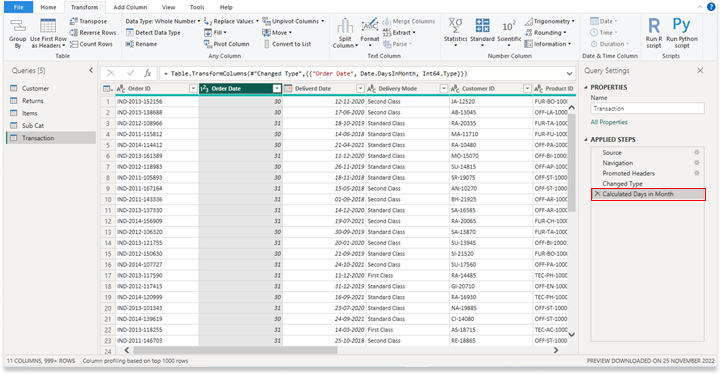
STEP 3: From the below screenshot, you can see the date and Time in the Hire date column replaced by the total number of days in a month.
Text Transformation
- In the case of text transformation, Split and Extract is one of them. As the name suggests, when used Split Column option, it distributes the existing data by adding separate columns in the data table. Options available under Extract. In the case of Extract, it just extracts certain characters from the column.
- STEP 1: First, go to Transform Tab. Under this tab, you can see text columns under that we will see all the text transformation options like extract, split, format etc.

Split Columns
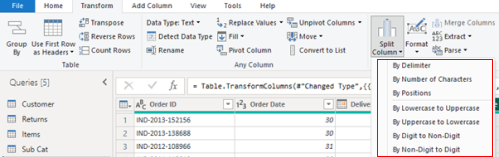
When we use Split Column option, it distributes the existing data by adding separate columns in the data table.
Options Under Split
Extract Columns
In the case of Extract, it just extracts certain characters from the column. Depending on whether we are selecting this under Transform, it replaces the existing value or creates an added column.

Format Columns
It is more or less changing of data. To be more specific.
Options Under Format

Number Transformation
- STEP 1: In the case of number transformation, First, go to Transform Tab. Under this tab, you can see number columns under that we will see all the number transformation options like statistic, standard, scientific etc.

STEP 2: In statistic number transformation, we can perform statistical formatting like sum, min, max, standard deviation etc.
Options Under Statistics
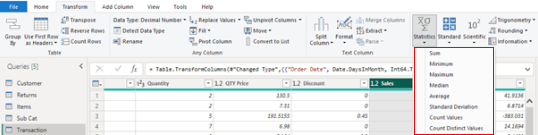
- STEP 3: In standard number transformation, we can perform standard formatting like add, multiply, percent of etc.
Options Under Standard
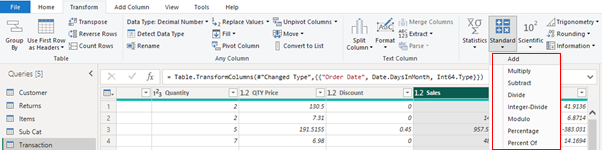
There is some more number transformation which we use they are Scientific, Trigonometry, Rounding and Information. But most of the time we use Statistics and Standard number transformation.
Conditional Column
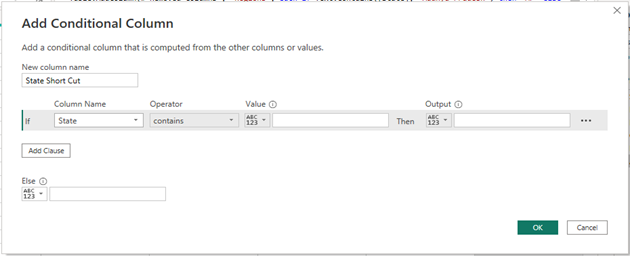
- STEP 1: Select Add Column > Conditional Column. The Add Conditional Column dialog box appears to help you create a syntactically correct formula:
if condition then expression else expression

STEP 2: In the New column name box, enter a unique name for your new conditional column. In the example, we change the name from Custom to State Short Cut.
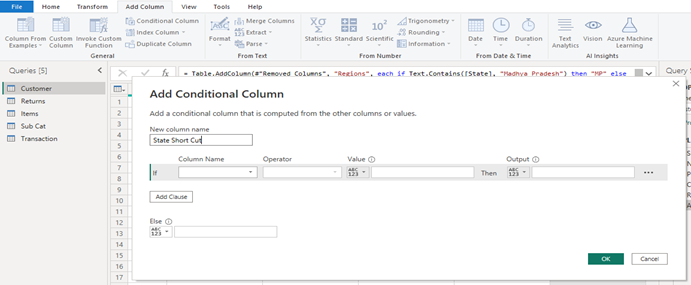
- STEP 3: In the Column name list box, select a column name. we have selected states.
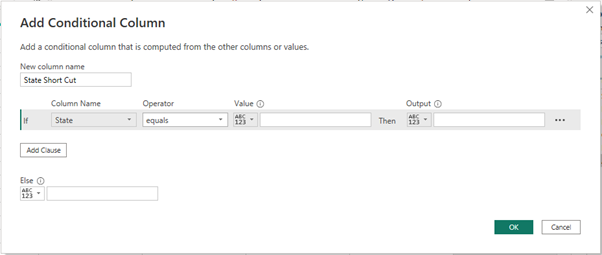
STEP 4: In the Operator list box, select an operator. Here, we will select Contains.
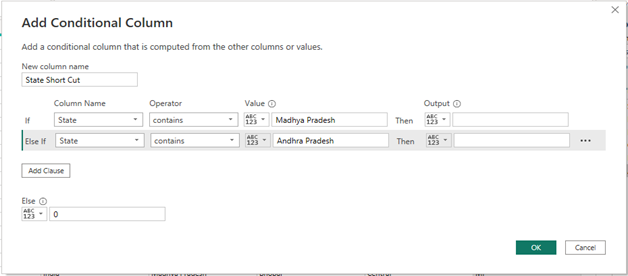
STEP 5: In the Value box, enter the appropriate value. Here, we have entered “Madhya Pradesh” and “Andhra Pradesh”.
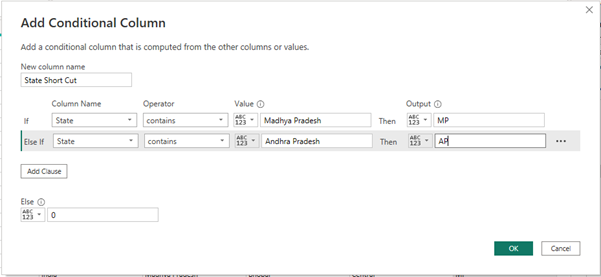
STEP 6: In the Output box, enter the output value that your conditional column should display when the if condition is true. Here, we have entered Madhya Pradesh as “MP” and Andhra Pradesh as “AP” if condition is not true show 0 as output.
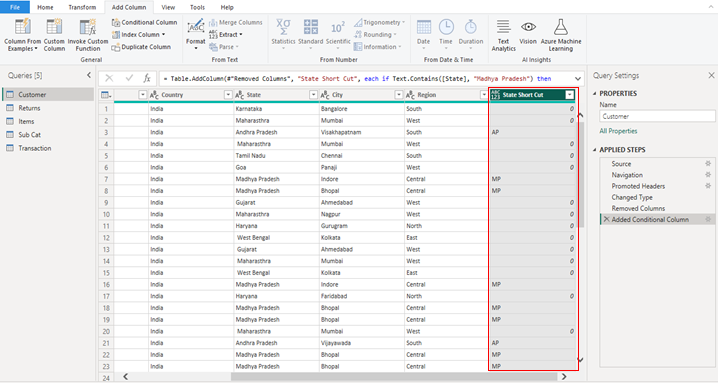
After applying conditional column the output:
Add comment